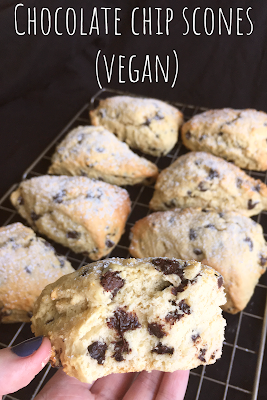
Scones are so quick and easy to make, and have always been firm favourite of mine. Normally I would be making fruit scones, however I decided to mix things up and go for some dark chocolate chips, making a sweet, vegan and satisfying snack.
I would normally shape my scones using a cookie cutter, however this time I decided to shape the whole dough into a circle, then cut this into triangles. The bonus of this method is that no mixture is left over. I also happened to make GIANT scones using this method, so if you're not after large scones, divide the dough into two, then shape each half into a round and cut this up into smaller triangles. I did quite enjoy having giant scones though!
If you do make these scones, feel free to tag me on Instagram using @susiechef or #susiechef so I can see!
Total time: 45 Minutes (plus cool time)
Yield: 8 Scones
Ingredients
Yield: 8 Scones
Ingredients
- 475g Self Raising Flour
- 75g Caster Sugar
- Pinch of Salt
- 75g Vegan Butter
- 175g Dark Chocolate Chips (Dairy Free)
- 250ml Dairy Free Milk
- Icing Sugar (for decoration)
- Preheat your oven to 180 degrees celsius, and line a baking tray with baking paper
- Sift together the flour, sugar and salt in a large mixing bowl.
- Pour in the chocolate chips, and mix these in.
- Break the butter into little pieces and rub these into the flour mixture using your fingers until the mixture resembles bread crumbs.
- Stir in the dairy free milk gradually, then knead the dough slightly in the bowl to bring it together.
- On a clean floured surface, knead the dough gently until it is smooth.
- Form the dough into a 1-inch thick, 7-inch circle (see picture), then cut this into eight triangles.
- Brush the tops of each of the scones with a little dairy free milk, then bake for 12-15 minutes.
- Take out of the oven, leave to cool on the baking tray for a few minutes then transfer to a cooling rack to cool completely.
- Dust with icing sugar and enjoy!
©Susiechef. All images & content are copyright protected. I am the legal copyright holder of all material on this blog and you may not reprint or republish any images or content without my written permission. All information on this blog is for entertainment purposes only.
Disclosure: This post may contain affiliate links, from which I earn a small percentage of commission at no extra cost to you if you choose to purchase the items.
Disclosure: This post may contain affiliate links, from which I earn a small percentage of commission at no extra cost to you if you choose to purchase the items.


No comments
Post a Comment